Saturday, May 30, 2009

Greek Omlettes

Poor David has had a tough week. He's had hay down for a week, and because of working, rain, sick calves, and machine malfunction, he's had a heck of a time getting it baled. Bless his heart! I decided that, even though I can't really help with putting up the hay, at least I could make him a hearty breakfast before he went out to finish it up. I decided last night that omlettes would be good...especially because I had plenty of fresh veggies to use. Here's my omlette-making station:
After I got all my ingredients/fillings together, I realized they were all "Greek"...so we had Greek omlettes this morning! I also made bacon, grits, and toast (with my first-ever homemade blackberry freezer jam). It was a delicious meal!The morning light in my sunroom made the pictures so pretty!

Thursday, May 28, 2009

Thrifty Thursday: Spice Mixes

One night last week, I decided that David and I would have tacos for supper. Tacos are pretty regular in our dinner rotation, because they're quick and easy. They're a filling, no-frills dinner for those nights when you've worked until 7 and you're hungry. I always have a couple of packages of McCormick's taco seasoning mix on hand. I opened the cabinet last week to get out the seasoning mix and...it wasn't there! I was out! I had already browned the ground beef, chopped the onion, fixed up the olives, chopped the lettuce...I was committed to tacos. So what to do?! I made my own taco seasoning! I logged onto Recipezaar, because I knew I could find something there. There were tons of taco seasoning blend recipes there, so I just picked one that had a high rating. In a matter of a minute or two, I had mixed up enough homemade taco seasoning for three or four taco dinners! I must admit, I didn't like it as much as McCormick's, but it was good. I've got it stashed in the cabinet for future emergencies! I've also made my own Greek seasoning blend (it's on the left; the taco seasoning is on the right). Again, it's not as good as the Cavender's blend that I buy (the homemade version is a little heavy on the cinnamon), but it's still good. And I'm always amazed at the quantity of these mixes that I can make with what I have on hand in my spice cabinet. If there's a spice blend that you're tired of paying for, check out Recipezaar, because they've got tons of recipes for any spice blend you can think of!

Wednesday, May 27, 2009

Caramel Crunch Bars


I'm still playing catch up with the other Tuesdays with Dorie group members. I joined a couple of months ago, and every chance I get, I try a new recipe from Dorie Greenspan's cookbook. I have had the ingredients on hand to make these bar cookies since I got the cookbook, but I haven't had an occasion to make them. And I can't just bake things for no good reason, you see, because Hogatha will come out. You've met Hogatha. She's my always-hungry, never-satisfied alter ego. She loves baked goods. She can't practice self-control. She doesn't even know what it is. And she loves Caramel Crunch Bars, I've discovered! Before these, my top recipe from Baking: From My Home to Yours was the Mango Bread. Before that, it was the Banana Cream Pie. But these quickly zoomed to the top of my "Oh my goodness, that is so good!" list. And one of the very best things about them is how darn easy they are to put together! You can find the recipe on page 112 of the cookbook (I didn't even have to look it up, because I've drooled over the picture so many times), or you can get the recipe here.
Look at the layers, would ya? YUM! A chocolatey shortbread crust (I have a very soft spot in my heart for shortbread), a silky smooth chocolate layer, and some Heath Toffee Bits sprinkled heavily on top. Caramel is noticeably absent from the ingredient list. I don't know why Dorie calls 'em Caramel Crunch Bars. I didn't really taste anything caramely. I did get the coffee taste that comes from the shortbread, for sure...and I loved it. And I got the chocolate...who couldn't?! And I got the toffee pieces, but they aren't really caramelly. They're tofee-ey! Who cares, though? This stuff is good! The recipe makes a 9x13-inch pan full. See?
Now, listen to this! Dorie says to cut these into 54 BARS! WHAT?! Please, Dorie. We Americans are gluttons! We don't want to be teased, especially with something like this. We want something substantial! If you got 15 or so pieces out of this, I'd say you'd have a portion I'd be happy with. And get this...Dorie said that these are great if you use them to make ice cream sandwiches! That's an idea I can get behind! However, I did refrigerate these bars overnight, and when I took them out the next day, you would have broken your teeth trying to eat them. I'm thinking her idea is perfect in theory, but maybe hazardous in practice. But I'd definitely give it a try, because these will be in my regular dessert rotation!

Tuesday, May 26, 2009

TWD: Chipster Topped Brownies

It's Tuesday, so that means it's time for another decadant creation from Dorie Greenspan's cookbook, Baking: From My Home to Yours. This week, we have Beth, from Supplicious to thank for the extra caloric intake!
So...what is a Chipster-Topped Brownie, you ask? It's a very chocolatey brownie that has chocolate chip cookie dough spread on top. Yep...a little over the top, huh?
I decided to make these for our church women's group meeting last Thursday, and they were a hit. I made them on Wednesday night, so as usual, there aren't any process pictures. But let me tell you...they were actually more work than I thought they were. And they didn't come together as easily as Ms. Dorie might lead you to believe. I could not get my cookie dough to spread over the brownie batter to save my life. That lead to the brownie abomination you see below:
I got a big ol' gap between my two layers! And, the layers weren't as distinct as I had hoped. The cookie dough just kind of sunk down into the brownie. It wasn't as impressive for pictures as I had hoped. But they were gooooooood. The brownie was fudgy, which is just the way I like 'em. And the cookie dough layer tasted like chocolate chip cookie...which is always great!

Overall, these brownies were delicious. However, I'm not sure that I'll make them again...they were awfully labor-intensive, and there are other (easier) things that I like just as well. Like the Caramel Crunch Bars (which you'll see tomorrow).

Monday, May 25, 2009

Grilled Portobello Mushroom Caps
This morning, I went to Kroger as part of my weekly grocery shopping excursion, and I always spend some time browsing through the produce after I've gathered what's on my list. I always stop by the mushrooms to see if there are any "manager's specials" in the refrigerator case. The regular white button mushrooms are always pretty reasonable, but I like the portobello mushrooms (full-grown, and babies)...they just seem to have more flavor. But of course, they're always more expensive. Today, I was in luck! There were a couple of packages of HUGE portobello mushroom caps on sale for $1.99, so I snapped up a package. You see, in the summer, Kroger sells pre-made stuffed portobello mushroom caps for something like $5.99 a pound. I like to make my own for cheap!
Here's what I used:

the portobello mushroom caps, of course...

fresh spinach, straight outta Shirley's garden...

Italian diced tomatoes, drained really well...

and some crumbled feta cheese.

Doesn't that look good?!

From the grill...

to the plate! YUM!

These were a great side dish for our dinner tonight. The whole process was really simple, and the finished product was...YUM!

Sunday, May 24, 2009

Blueberry Torte for Aunt Betty
A couple of months ago, our church's women's group (The Agape Ladies' Group) went to the Crestview Nursing Center in Shelbyville to take desserts to the residents there. Two of the residents just so happened to be my great-great aunts (my great-grandmother's sisters), Aunt Ted and Aunt Mitch. Yes, you read that correctly...they were my aunts and we always called them Mitch and Ted. Both ladies have since passed away (a day apart), and they will be missed! Anyway, my contribution to the dessert menu for our visit was a Blueberry Torte, which was a recipe given to me by my mother-in-law, Shirley.

The first step in the torte is to create the beautiful and delicious nutty crust:

Look at those nuts! This is so easy!

The next step is to make the cream-cheese layer:

again, super easy!

Then, you add the fruit filling of your choice. I chose blueberry:

this is ridiculously simple!
Finally, you add the Cool-Whip layer:
and that's it!
Unfortunately, I didn't get any pictures of the slices of the torte, but believe me, it was delicious! My Aunt Betty (my grandmother's sister) loved the torte and asked me for the recipe several times. But I never had the recipe with me, and while I could remember all the components, I couldn't remember the quantities. But finally, I emailed the recipe to her. But I know my Aunt Betty, and something tells me that it's possible that she could lose the recipe I sent her. So here it is! (And now I don't have to dig the recipe out for myself anymore!)

Blueberry Torte
Suzanne Lubera
Crust:
1 1/3 cups flour
1 stick melted butter
1 cup chopped pecans
Mix all the ingredients and press into a 12x9-inch pan. Bake at 400 degrees for 15 minutes. Cool completely.
Filling:
16 oz. cream cheese, softened
2 cups confectioner's sugar
Fruit topping of your choice (I used 1 can of blueberry pie filling)
16 oz. Cool-Whip
Mix cream cheese and sugar together and spread on the crust. Spread fruit topping on top of the cream cheese filling and then spread Cool-Whip over the fruit filling.
This dessert is best made a day ahead.

Saturday, May 23, 2009

Pesto Pasta with Grilled Chicken and Veggies
I've been reading food blogs for some time now, and I've been so impressed and inspired by what I see on them. There are tons of super-talented people out there doing awesome things with food. I see all these fabulous dishes and desserts that people just put together with what they have on hand, and I wonder, "Could I do that? I'm not sure I can." For most things I make, I sort of follow a recipe. I usually don't pay a lot of attention to quantities of ingredients, but I'm pretty reliant on recipes to help me put something together. This weekend, I decided that I was going to go out on a limb and create my very own dish from my own imagination! NO RECIPES ALLOWED! I've got to admit, it took me all weekend to mull it over in my head to decide exactly how I would approach it. I found that it came to me in little pieces at a time. First, I decided that I wanted some pasta, mostly because it seems like I haven't had pasta in awhile. Of course, I knew grilled chicken would be involved, because I always have chicken. I also realized that I still had a package of Chet's homemade pesto in my freezer, so I started craving that. But what could I do to make it special? Well...we've still got asparagus from Mama's garden, so I thought I should include it. From there, I just started thinking about things that might taste good together. Here's what I came up with:
we've got the whole-wheat pasta, the super-yummy pesto, a jar of roasted red peppers, Paula Deen's house seasoning, some sliced baby portobello mushrooms, some freshly cut asparagus, and garlic. I also added some chopped red onion, but I forgot to get it in the picture. Sorry!
I also apologize that there are no process pictures, because I can't get any decent light in my kitchen. I don't even try to get pictures in the kitchen anymore. It's useless. They turn out all yellow and muddy-looking. But here are some pictures of the finished product:
I warned David before we sat down to eat. He was fully aware that this was created from my imagination and no recipe was followed, so I couldn't make any guarantees that it would be edible! I was very pleasantly surprised! I thought it tasted great! It was just very fresh and spring-like. I think pesto smells like spring, anyway. I think David liked it, but I'm not sure. He ate several bites before he said anything. He's kind of hard to read. He said he liked it, so I'll have to trust him on it. I really enjoyed it, and will definitely make it again. I'm so proud of myself!

Pesto Pasta with Grilled Chicken and Veggies
Erin Orr's first original recipe!
9 oz. whole wheat penne pasta
20 oz. chicken breasts
Paula Deen's House Seasoning
8 oz. baby portobello mushrooms, sliced
fresh asparagus, cut into 2" pieces
1 jar roasted red peppers in olive oil
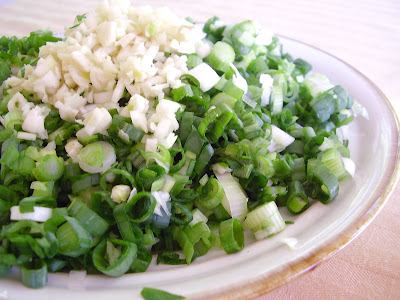
red onion, chopped
fresh garlic, minced
8 0z (or more) pesto
Cook whole wheat pasta to al dente. Keep warm.
Season the chicken breasts with Paula Deen's House Seasoning. Grill and keep warm.
Heat a tablespoon or so of the olive oil (from the red peppers) in a non-stick skillet. Add onions, garlic, and mushrooms. Saute until mushrooms begin to brown. You may need to add some more olive oil. Add the asparagus and continue to saute. Once they are crisp-tender, add the roasted red peppers and heat through. Once everything is warm, drain any accumulated liquids.
In a large bowl, combine the warm pasta and grilled chicken. Add the sauteed vegetables. Pour the pest over the pasta, chicken and veggies. You don't need to warm the pesto, because the heat from your other ingredients will take care of it. Toss to combine and coat all the ingredients with the pesto.
Serve topped with freshly grated parmesan cheese. Enjoy!

Thursday, May 21, 2009

Thrifty Thursday!
Whew! It's Thursday, and I'm worn out! But I'm here, and ready to tell you all one more way to be thrifty! Now that it's springtime (almost summer!), it's time to get your flowerbeds and gardens ready. Lots of people are dropping lots of cash at nurseries and garden centers. But I'm going to tell you a way to save lots of money in this department, but in order to take advantage of it, you have to have a kind and generous neighbor or family member.
When David and I moved into our house, the flowerbeds were a wreck. The soil wasn't in good shape, and the beds were weedy. We went to work cleaning them up, but David and I are both pretty tight with our money, and we just couldn't bear to spend a ton of money on flowers that were probably just going to die (because I do not have a green thumb). We did buy one flowering cherry tree, but that was about it.
My mom told me that it would be a good idea to plant lots of perennials, so that I wouldn't just be spending money every season on annuals that would only be good for a season. And then, Mom offered to divide some of her plants so that I could get my flowerbeds started! She's a pretty awesome Mom, that's for sure. Here are some pictures:
This one is my favorite. I think it's called cetum. It reminds me of a cactus, but it's not prickly. It's a succulent, I think. And it's hardy. If it ain't hardy, I ain't plantin' it, that's for sure. It just gets bigger and bigger every year!
This is my biggest hosta (please overlook the weeds). Mom gave me five hostas from her plants, and this one is HUGE compared to the others. The funny thing is this: hostas are shade plants, but I didn't know this when I got started with my planting, and I don't have a lot of shade. It got planted in full sun, and it's thriving. To the right there is some kind of a lilly. Mom gave me several lillies, and most of them have done well. I also got two butterfly bushes from her, and they're doing great!
Overall, I've had more luck with the hand-me-down divided plants than with anything else I've planted. I feel like they've kind of proven themselves and they're established, so they're pretty safe bets. I told one of my friends about this a year or so ago, and then she asked her grandmother if she would mind to divide her plants. I know that my Mom doesn't really like for her plants to get really huge, because her beds aren't that big. She seemed to welcome the opportunity to divide them and share them with me. Maybe some of your friends and family wouldn't mind to hook you up with some hardy foliage, as well! It never hurts to ask!

Tuesday, May 19, 2009

TWD: Fresh Mango Bread
Even though I haven't officially been a member of Tuesdays With Dorie for all that long, I've been baking lots of things out of the cookbook (Baking: From My Home to Yours). I have decided that this is pretty much my very favorite recipe so far. I have a soft spot for quick breads, though. I love quick breads of any kind...I'd rather have a quick bread over just about anything. But this quick bread falls into the category of one that I would have never made if I hadn't been a member of TWD. I mean, I live in small town Kentucky! Who makes mango bread?! I like mangoes, but I had never thought of using them in a quick bread, but I have Kelly, from Baking with the Boys to thank for encouraging me to make this one!
Here's what you need:
flour, baking soda, baking powder, ginger, cinnamon, some eggs, brown sugar, lime zest, a mango (duh) some oil, sugar, and golden raisins. Let me say that I am so happy to have a recipe that doesn't require room temperature butter! I can never, ever remember to put my butter out to get to room temperature, so that sets me back a little while! Yay for oil!
This comes together really easily, in just two bowls! I love my KitchenAid mixer, but I was glad to have a recipe that didn't require it. The batter sure is stiff, though. Dorie's right, it's more like a dough than a batter. After baking (and waiting a whole day to try it, because Dorie says it's better that way!), here's what we have:I just wish that I had used another mango. It had a great flavor, especially when you got a big bite of the mango, but I don't think I got quite the 2 cups that the recipe called for. But the flavor of this bread was fabulous. I gave two generous slices to David's grandmother, Mama (pronounced Mamaw...she's my guinea pig), and I think I pretty much ate the rest. I think David had two slices, but mostly it was me.
Last Saturday, I used this recipe to make some banana bread, because I thought the flavors would work really well together. I mashed the banana, so it kind of disappeared into the batter, so next time, I think I'll try to leave some chunks. Overall, this was a great recipe, one I'll definitely use time and again, probably with lots of variations on the fruit. If you'd like the recipe, head on over to Kelly's site. I'd recommend that you go right now.

Monday, May 18, 2009

General Tso's Chicken and Roasted Asparagus
Tonight, I made two of our favorite things for dinner...General Tso's Chicken and roasted asparagus. This isn't the General Tso's chicken that you know and love from your local Chinese buffet, though. You see, a little over a year ago, I started making a conscious decision to lose some weight. A year later, I've lost about 20 pounds, and I've learned some ways to enjoy the foods I've always loved, just in a little healthier way. Real General Tso's chicken is deep fried and covered in a spicy-sweet sauce. Let's take a look at how we'll give him a healthier twist. You'll need some chicken breasts that have been diced into bite-sized pieces:
You'll also need some green onions and some minced garlic:

And yes, I used all that onion and garlic in this recipe. We like onions and garlic! They make everything better! (I used to use cheese that way...lots of cheese makes everything better. But garlic and onions are healthier!)
For the sauce, you'll need a few simple ingredients:

cornstarch, ground ginger, chicken stock, soy sauce, white wine vinegar, and sugar substitute (if that freaks you out, please feel free to use regular sugar. I do not fear the sugar substitute. Not even the dreaded Sweet 'N Low.)
Next, you'll mix all that stuff up into what's called a "slurry" I think. It'll look like this:

It looks a little like peanut butter, huh? Doesn't taste anything like it, though.
After you've sauted your onions, garlic, and cooked your chicken, you pour in the slurry and mix it. Since it's got that cornstarch in it, it's gonna thicken up pretty good. And it should look like this:

Mmmm! Spoon that over some cooked brown rice, and you've got some healthy Chinese deliciousness! Now, let's move on to the best part of the meal...the asparagus.
Check that out. Beautiful, huh? And it came straight out of Mama's garden (it's pronouned Mamaw, but no one spells it like that). She says the secret is planting male asparagus. I didn't know asparagus could be male or female, but I know I love the end result! Fresh asparagus is the best part of spring. I think David and I could each eat our weight in it every night! To get lovely, delicious roasted asparagus, just drizzle the asparagus spears in some olive oil and toss it around to coat it. I also sprinkle on some Greek seasoning, because that stuff is good on anything. Then, roast it in a 425-degree oven, until it's a tiny bit crispy, and you're ready for some good eatin'! Make sure you sprinkle some freshly grated parmesan over it, too.
Doesn't that look absolutely fabulous? Even though the flavors are a little disjointed together (Chinese with Greek-seasoned asparagus?), it's a great, easy, healthy weeknight meal.
General Tso's Healthy Chicken
recipe found at www.freewebs.com/hwc1973
For the sauce:
3/4 cup chicken broth
2 Tbs. cornstarch
2 Tbs. sugar substitute
2 Tbs. low-sodium soy sauce
1/2 tsp. ground ginger
1 Tbs. white wine vinegar
Whisk all ingredients together in a medium bowl; set aside.
For the Chicken:
6 green onions, chopped (use the white and green parts)
2 medium garlic cloves, minced
1/2 tsp. red pepper flakes
1 lb. boneless, skinless chicken breasts, cut into bite-sized pieces
2 cups cooked brown rice
Heat oil in a wok or large skillet over medium-high heat. Add green onions, garlic, and pepper and cook 2 minutes. Add chicken and cook until browned all over, about 5 minutes.
Add the reserved sauce and simmer until sauce thickens and chicken is cooked through, about three minutes. Serve chicken and sauce over rice.

Sunday, May 17, 2009

Pizza from Leftovers Challenge!
Yesterday afternoon, I was trying to decide what to make for supper. Of course, I thought about something made from chicken...probably some kind of pasta and chicken dish. But then, I had a flash of brilliance and decided that I wanted pizza. I hadn't had pizza in a long time, and I knew David would be more excited about pizza than the prospect of yet another variation of chicken. I decided to challenge myself and make my pizza entirely out of leftovers, just stuff we had around the house. Luckily for me, I had a portion of pizza dough leftover from my Superbowl Pizza Extravaganza, during which time I fed my parents and my in-laws since they had been out of electricity for a week due to a huge ice storm. I had never used frozen pizza dough, and it was a bit of a bear to roll out. But I persevered!
I was sure that I had about half a pound of Italian sausage in the freezer, but to my dismay, it was just ground beef. *sigh* I did try to jazz it up a little with some Italian seasonings, onion, and garlic. It did give it a little kick.
I also didn't have any pizza sauce. However, I did have some tomato sauce and a variety of spices, so I made do. It turned out better than I thought!
Let's start putting this pizza together, whaddaya say?

The homemade, thrown together pizza sauce was a little runnier than I would have liked, but it worked fine in a pinch. I had about four partial bags of different shredded cheeses, so I used those. We had some red onion in the fridge and some black olives (YUM!). I put a little olive oil around the edges of the crust, just to make it crispier and because I thought it would be a good idea. I baked it on my pizza stone at 400 degrees for a little while (I can't remember how long...maybe 20 minutes?), and pretty soon, we had pizza-from-leftovers goodness!
It would have been better with Italian sausage, but I have to admit, it was pretty darn good to have been made entirely of leftovers! I think David was pretty impressed, too. But he's generally amazed that I can get a couple of chicken breasts and some canned veggies on the table in less than 20 minutes. He's not picky and easy to please. Just a couple of the many reasons I love him!

Saturday, May 16, 2009

Cheesecake!
This is going to be a continuation of my Mother's Day post from last Sunday. My mom loves cheesecake. I knew I needed to bake one for her for Mother's Day. But, you know...cheesecake is kind of intimidating. I made one a couple of years ago, in the terrible oven that was in our house. Really, I smoked a cheesecake in that oven. It wasn't a pretty picture. But now I have a beautiful, non-smoking oven, so I thought I'd give it a whirl.
This is what we'll need to make Dorie's Tall and Creamy Cheesecake:
It's pretty simple, really...eggs, cream cheese, sugar, sour cream, and vanilla. After we get it all mixed up, it looks like this:
velvety deliciousness! There was lots of mixing involved, but Dorie said we wanted a very aerated batter...we got it! I couldn't believe how smooth and creamy it was! (And it was delicious, straight off of the spatula. You know I couldn't resist.) It was absolutely killing me to not put something in the batter (like chocolate chips, or brownie pieces, or Snickers pieces, or something...anything!), but Mom is a cheesecake purist. And it's her day. So we're having basic cheesecake. But wait! What are we going to bake it in?!
A graham cracker crust! I did cheat a little and used store-bought graham cracker crumbs that I had on hand. See the aluminum foil? There are about 4 layers of aluminum foil wrapped around that spring-form pan. At this point in the process, I was apprehensive about sticking it in the water bath. The last thing I wanted was a soggy Mother's Day cheesecake! But I went for it, and after what seemed like an eternity...
I had a beautiful tall and creamy cheesecake! It got a little more brown on the top than I would have liked. I had the pan in the middle of the oven, like the recipe said, but it just got a little too brown. Next time, I'll lower the rack a notch or two.
I also make some homemade dulce de leche to put on the cheesecake (since I didn't put anything in it):
And then I drizzled the homemade dulce de leche on top of a HUGE slice of cheesecake...
And then I ate the whole thing! It was very good, but I still need some practice. You see, the master cheesecake baker, Paul C., lives next door to Mom and Chet. He makes awesome, beautiful, unbrowned, crack-free cheesecakes. I mean, they are divine. Mine isn't quite up there with Paul's cheesecake, but it was pretty darn good!
I can't wait to make it again, but with something delicious mixed in. I've seen a few people make beautiful layered cheesecakes, and I'm feeling inspired. I have plans to make a three-layer cheesecake. A chocolate crust, followed by a chocolate layer, a peanut butter layer, and a layer of plain cheesecake with Reese Cups. That will be great...once I figure out in my head exactly how I want to approach it. I need an occasion to make it though, because I can't have a three-layer chocolate and peanut butter cheesecake hanging around my house. That would be BAD NEWS.
I used Dorie Greenspan's Tall and Creamy Cheesecake recipe. You can find the recipe here, on Anne Strawberry's blog. She got a little wild and crazy with hers...peppermint bark-flavored cheesecake. Yum!

Thursday, May 14, 2009

Thrifty Thursday!
Grow your own herbs! This is my third year for having my own little herb garden, and it's gotten better every year. The first year, I was really ambitious and thought I'd start my herb garden from seeds. Forget it. I had ZERO luck with that. Last year, I went to Thieneman's Herbs and Perennials in Louisville and had much better luck. They had pretty much any herb that you could think of (and several that you would never think of!). Last year was also my first year for my multi-tiered self-watering pot that I got from my in-laws (it came from The Red Barn in Bradenton, Florida, which is a super-cool place in its own right...they have an amazing farmer's market!). The combination worked great! I loved having fresh herbs all summer long. It was so nice to just walk out my back door and snip off some basil or rosemary! This year, I couldn't wait to get my herb garden out. I didn't know when I'd get to Thieneman's again, so I had to settle for Lowe's and Wal-Mart. This year, I bought three basil plants, because I use it the most. I'm hoping to have big, hardy basil plants this year, because Chet and I have big plans to make lots of pesto! YUM! I got two rosemary plants and two flat-leaf parsley plants (correction...I bought one rosemary plant...my in-laws bought me a rosemary plant for my birthday, as well). I love rosemary with chicken, and of course, parsley's good in anything! To round out my herb garden, I chose a sage and oregano (because that's really all they had at Lowe's and Wal-Mart). I wish I had a thyme plant, and I've got to rustle up some chives somewhere. I love chives. I tried to grow cilantro last year...no luck. I gave up on it this year.
So why is this thrifty? My local grocery stores (Wal-Mart and Kroger) don't really carry a wide variety of herbs. I can buy big bunches of cilantro for 98 cents, but stuff like basil and rosemary? A tiny little package costs about $2.00. I have about $20 in herbs in the pot you see above. I figure I'll get my money's worth out of it! If I just use them 10 times (oh, but I'll use them much, much more!), I'll have broken even. Very thrifty, indeed!
Related Posts Plugin for WordPress, Blogger...