Tuesday, March 29, 2011

Bun in the Oven

The blog posts around here have been kind of hit or miss lately, and I apologize. Things are getting pretty hectic around here. It's been a busy semester with work, and there's more news, too. We're expecting a baby! Yep, we've got a bun in the oven here at The Sweet Life! The Little Sweetie will be here in early June of this year...in just about 2 months! (If you're interested in reading more pregnancy news, click here.) I had plans to make these cinnamon rolls much earlier in my pregnancy and announce our big news with a picture of the rolls in the oven. Well...I just never got around to it until this weekend (at 31 weeks pregnant!), and then I forgot to take the "bun in the oven" picture! Sheesh. Butanyway, without further ado, I give you Ultimate Cinnamon Rolls, from Cook's Country: I think part of my not getting around to making these rolls had more than a little to do with my fear of yeast bread, but pregnancy cravings trumped my fear this weekend, and I put these delicious rolls together last Friday night after I got home from work. The recipe is pretty daunting when you just look at it, but really, it's very simple. I made the dough, let it rise, and assembled the rolls on Friday night. Then, I woke up Saturday morning, took the pan of rolls out of the fridge, turned on the oven, and went back to bed. About 2 hours later, we got up and I stuck the rolls in the oven. Then, about 40 minutes later, I had beautiful, decadent, homemade cinnamon rolls on the table. Oh, yum.
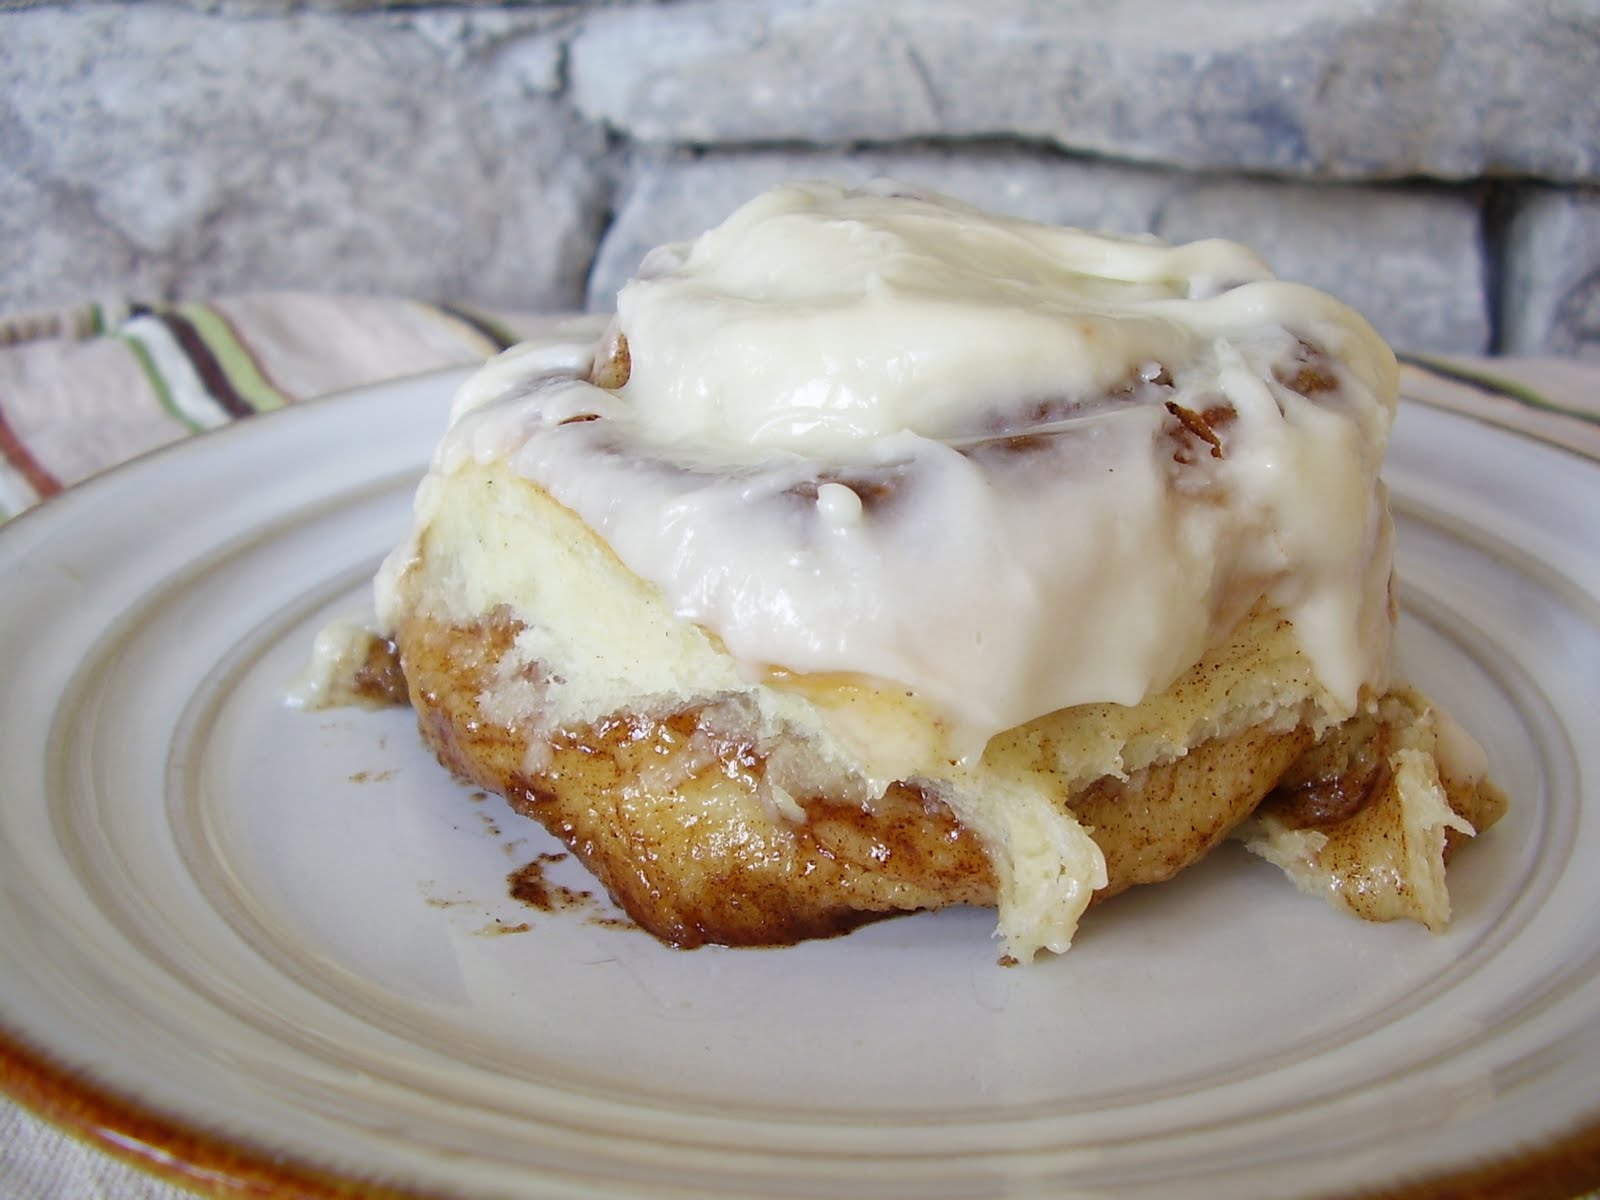
These rolls are so very good, but they're really an obnoxious size. They are HUGE! These are definitely special occasion treats...like for when you announce to the blog world that you're expecting a little one!

Ultimate Cinnamon Buns

Cook's Country

Dough 3/4 cup whole milk, heated to 110 degrees 2 1/2 tsp. instant or rapid-rise yeast 3 large eggs, room temperature 4 1/4 cups all-purpose flour 1/2 cup cornstarch 1/2 cup granulated sugar 1 1/2 tsp. salt 12 Tbs. unsalted butter, cut into 12 pieces and softened Filling 1 1/2 cups packed light brown sugar 1 1/2 Tbs. ground cinnamon 1/4 tsp. salt 4 Tbs. unsalted butter, softened Glaze 4 oz. cream cheese, softened 1 Tbs. whole milk 1 tsp. vanilla extract 1 1/2 cups confectioner's sugar
Instructions: 1. For the dough: Adjust oven rack to middle position and heat oven to 200 degrees. When the oven reaches 200 degrees, shut off. Line 13x9 inch baking pan with foil, allowing excess foil to hang over pan edges. Grease foil and a medium bowl. 2. Whisk milk and yeast in measuring cup until yeast dissolves, then whisk in eggs. In bowl of stand mixer fitted with dough hook, mix flour, cornstarch, sugar, and salt until combined. With mixer on low, add warm milk mixture in steady stream and mix until dough comes together, about 1 minute. Increase speed to medium, and add butter, one piece at a time, until incorporated. Continue to mix until dough is smooth and comes away from the sides of the bowl, about 10 minutes. Turn dough out onto clean surface and knead to form a smooth, round ball. Transfer dough to prepared bowl, cover with plastic wrap, and place in warm oven. Let rise until doubled in size, about 2 hours. 3. For the filling: Combine brown sugar, cinnamon, and salt in small bowl. Turn dough out onto lightly floured surface. Roll dough into 18-inch square, spread with butter, and sprinkle evenly with filling. Starting with the edge nearest you, roll dough into tight cylinder, pinch lightly to seal seam, and cut into 8 pieces. Transfer pieces, cut-side up, to prepared pan. Cover with plastic wrap and let rise in warm spot until doubled in size. 4. For the glaze, and to bake: Heat oven to 350 degrees. Whisk cream cheese, milk, vanilla, and confectioner's sugar in medium bowl until smooth. Discard plastic wrap and bake buns until deep golden brown and filling is melted 35 - 40 minutes. Transfer to wire rack and top buns with 1/2 cup glaze. Cool 30 minutes. Using foil overhang, lift buns from pan and top with remaining glaze. Serve. Make ahead: After transferring pieces to prepared pan in step 3, buns can be covered with plastic wrap and refrigerated for 24 hours. When ready to bake, let sit at room temperature for 1 hour. Remove plastic wrap and continue with step 4 as directed.

Monday, March 14, 2011

Menu Plan Monday - March 14th

I'm back with my menu plan for the week (see LOTS of other menu plans at Org Junkie). I didn't get around to posting last week, but I promise you didn't miss anything. It was a crazy-busy week around our house, and we did well just to get some food in our bellies! I had somewhere to be every night except Friday, so it was pretty much a slap-dash, grab on the go kind of week...not the kind of week I enjoy. This week, I don't really have any evening obligations except for Monday night, but because David and I will both be off work all day due to a funeral, I'll still be able to fix us a nice meal. Here's what we'll be having this week:
Monday: Greek-Style Skillet Supper (recipe found in the Sunday coupons!) with a salad.
Tuesday: Slow Cooker San Francisco Chops with rice and roasted green beans.
Wednesday: Garlic Marinated Chicken Cutlets with Grilled Potatoes and a salad.
Thursday: Mexican Polenta Casserole and roasted green beans.
Friday: Inside Out Eggroll Casserole.
Saturday: Leftovers, or dinner out for my birthday.
Sunday: Leftovers/forage in the fridge.

Wednesday, March 2, 2011

Red Velvet Cake

It's birthday season again! Chet & Larry's birthdays are back-to-back (February 24th and 25th), so this year, I made a shared birthday cake for them. Last year, they got individual desserts (Larry's is here and Chet's is here), but neither of them told me waht they wanted this year, so I got to pick. For some reason, I've been looking for a reason to make a red velvet cake, so that was this year's birthday treat! When I took the cake in to my parents' house, Larry said, "What kind is it?" When I told him it was red velvet, he said, "I don't know a single man who doesn't like red velvet cake." And what is that about, anyway? Remember in Steel Magnolias...the armadillo groom's cake? Why do men like red velvet cake? It's delicious, that's why! I think I may have overcooked (or overmixed) my cake layers, but they were still quite tasty. But the icing? Divine. I have found my go-to cream cheese icing!


Red Velvet Cake with Cream Cheese Frosting
Brown Eyed Baker, via Joy the Baker
For the Cake:
8 T unsalted butter, at room temperature
1 1/2 cups granulated sugar
2 eggs
5 T unsweetened cocoa powder
6 T red food coloring
1 tsp vanilla extract
1 cup buttermilk
2 cups + 2 T all-purpose flour
1 tsp salt
1 tsp baking soda
3 tsp distilled white vinegar
For the Cream Cheese Frosting:
8 oz. butter, at room temperature
8 oz. cream cheese, at room temperature
5 cups powdered sugar
2 T vanilla extract
To Make the Cakes:
Preheat oven to 350 degrees. Grease and flour 2 9" cake pans.
On medium-high speed, cream the butter and sugar until light and fluffy, about 3 minutes. Turn the mixer to high and add the egg. Scrape down the bowl and beat until well incorporated.
In a separate small bowl, mix together the cocoa powder, vanilla extract, and red food coloring to make a thick paste. Add to the batter and mix on medium speed until completely combined. You may need to stop the mixer to scrape the bottom of the bowl, making sure that all the batter gets color.
Reduce the mixer speed to low and slowly add half of the buttermilk. Add half of the flour and mix until combined. Scrape the bowl and repeat the process with teh remianing milk and flour. Beat on high until smooth.
Again, reduce the mixer speed to low and add the salt, baking soda, and vinegar. Turn to high and beat for another couple of minutes until completely combined and smooth.
Divide the batter evenly between the cake pans and bake for about 40 minutes, or until a thin knife or skewer inserted into the center of the cakes come out clean.
Cool for 10 minutes, and then remove cakes from the pan. Place them on a cooling rack to cool completely before frosting.
To Make the Frosting:
Using the whisk attachment, whip the butter and cream cheese on high speed for about 5 minutes, scraping the bowl down as necessary. Reduce the speed to low and slowly add the powdered sugar until all is incorporated. Add the vanilla and mix to combine. Increase the speed to medium high and whip for a few minutes until the frosting is light and fluffy, scraping the bowl as necessary.
* Note: This recipe can be halved to make 12 cupcakes.

Monday, February 28, 2011

Menu Plan Monday

This week, I'm going to try something new...to the blog anyway, not to me. When David and I got married, I did not have any plan when it came to putting together meals during the week. That resulted in multiple grocery trips per week, and our eating an insane amount of pasta. I got really tired of going to the grocery umpteen times per week, and the pasta diet led to some weight gain, so I decided we had to do something about it. So...I joined Weight Watchers about 2 years ago and started planning our meals for the week. It made such a difference to know on Sunday afternoon what we'd be having for the entire week. Now, it's a routine. On Sunday afternoons, I get out the Kroger ad, cut coupons, look through cookbooks and blogs, plan my menu, and go to the grocery. It is a little more work up front, but it makes answering the "What's for dinner?" question so much easier to answer. I write the week's menu on an index card, post it on the fridge, and there are no more nights where I just stare at the fridge and wonder what we're going to eat!
A couple of weeks ago, I was reading Amanda's Cookin' and noticed that she's participating in Menu Plan Mondays, which is hosted by Laura at I'm an Organizing Junkie. I thought I'd join in on the fun! Here's what we'll be having this week:

Monday: Nothing planned. David and I (along with my mom) will be attending an Infant CPR class, so we'll grab something on our way there.
Tuesday: Pork tenderloin with mustard sauce; steamed broccoli as a side.
Wednesday: Leftovers for me; David will be with our church's pastor search committee conducting an interview, so he'll have dinner there.
Thursday: Grilled or baked Ranch chicken with steamed veggie medley.
Friday: Hamburgers for David, a veggie burger for me; oven roasted potatoes as a side.
Saturday: Our church's annual soup supper, so we'll be eating there.
Sunday: Leftovers/forage in the fridge (we eat a BIG meal on Sunday afternoons with my parents, so Sunday nights we don't usually have an organized meal).

Friday, February 25, 2011

The Bread of Life Cafe: A Review

I've probably only mentioned this a million times on the blog so far, but here I go again. For five wonderful years, I attended Lindsey Wilson College, a small, liberal arts school that's located in Columbia, Kentucky and is affiliated with the United Methodist Church. I also worked there for about 2 years after graduation as a full-time faculty advisor to freshman at risk for dropping out of school. I left LWC for about 3 1/2 years, but was luckily able to go back to work for them when their School of Professional Counseling opened a community campus in Louisville, Kentucky. The vast majority of you probably have no clue where Columbia, Kentucky is, and that's okay. It's in the middle of nowhere. Southcentral Kentucky, to be exact. And it's a geographical oddity...about 2 hours from everywhere. Anyway, it's not a metropolis by any means. There aren't very many restaurants (although Fiesta Mexico is delicous!), and the only chains are fast-food. What I'm trying to say is this: you can exhaust your new dining opportunities fairly quickly in such a small town. That's what initially led a group of coworkers to The Bread of Life Cafe in Liberty, Kentucky one afternoon. Liberty is another very small town (smaller than Columbia!) and is home to a large Mennonite and Amish community.
The Galilean Children's Home was founded in 1986 by Jerry and Sandy Tucker, and they are "a non-profit organization that cares for children all over the world that have been abused, neglected, rejected, are in need of medical treatment, or have been placed here for a Christian education." In one of their newsletters, I read that their monthly operating costs are roughly $200,000, and they get no federa or state funding. Their operations run solely on donations and fundraisers. You can imagine what a daunting task this would be, especially in a very rural area. One of their projects, which helps fund the Home, is the Bread of Life Cafe.
The Bread of Life Cafe is, without question, one of my favorite places to eat. If you visit, I think you'll be reminded of Cracker Barrel, but you'll be much more impressed. As you walk in the front doors, you enter a large gift shop, which carries a wide assortment of nice things. You'll find monogrammed everything (key chains, travel mugs, notebooks, etc.), purses, home decor, and baby items. They also have a fudge shop (!) and they also sell fresh-made breads and noodles.
Once you make your way through the gift shop, you'll find yourself in the restaurant, which has lots of seating. It's a very comfortable, homey atmosphere. There are displays of home goods/decor all over the restaurant, as well as beautiful framed prints. All of the tables are the type that you'd find in your kitchen or dining room at home.
The food is country-style comfort food, and they have a nice menu. It's got plenty of variety, but it's not so exhaustive that you can't make up your mind about what to have. In the past, at lunch, I've gotten the club sandwich, which is both delicious and HUGE. But usually, we go for the buffet. About two weeks ago, David and I took his mom and dad to Liberty for lunch at the Bread of Life and then on to shop at some local Amish stores (furniture, dry goods, grocery, etc.). Of course, we opted for the buffet and weren't disappointed. They have an extensive salad bar, with all of the fixin's you could want. On the day we visited, the buffet had barbeque pork chops (delicious!), baked fish, and roast beef (which was very tender, according to my father-in-law) as entrees. Sides included beets, corn, green beans, scalloped potatoes, and several other things I can't remember right now. They also always have cornbread and rolls on the buffet. The rolls alone are worth visiting for:
See that plate between me and David? That's one roll. My roll, to be exact. I didn't share it. I ate it all, and I could have eaten at least one more, but I didn't want to be a glutton. They are light and fluffy, and golden with melted butter. Heavenly, I tell you. After you've had your fill
of what the buffet has to offer, you can try one of two desserts available buffet-style (on this trip, it was a white cake with icing, or strawberry crumble) and/or an ice cream sundae from the soft-serve ice cream station. It should come as no surprise that they nearly had to roll us out the front door after all we'd eaten. And all of this is only $9.99 per person (salad bar, unlimited rolls, and buffet, including dessert). The food is high-quality, prepared with care, and is absolutely delicious.
If you find yourself in Southcentral Kentucky anytime soon, please stop by the Bread of Life Cafe. You can reach them at 606.787.6110. They're open Monday - Thursday from 10am - 8pm, Friday - Saturday from 10am - 9pm, and closed on Sunday. If you'd like to see more pictures of the Bread of Life Cafe (including construction), visit them here. For more information about the Galilean Children's Home and their other projects, click here.

Wednesday, February 23, 2011

Cranberry White Chocolate Chip Cookies

One of the best things about loving to bake is this: you get a craving for something sweet, rummage through your pantry, and find the supplies to make wonderfully delicious cookies, which are warm and gooey from the oven in about 30 minutes. One of the worst things about loving to bake: you get a craving for something sweet, rummage through your pantry, and find the supplies to make wonderfully delicious cookies, which are warm and gooey from the oven in about 30 minutes. It works both ways, you see. I love being able to whip up something tasty in just a few minutes, but lots of times it's just too easy to do that whenever I get a craving. Which happens a lot. Like a few weeks ago, I decided I really wanted some cookies, so I found this recipe on the Internet. Did I need these cookies? Absolutely not. But I had all the ingredients...so why not?
If you're a fan of cranberries and white chocolate you will love these cookies. Of course, they're much better when they're still warm, but once they're cool, they're nice and chewy. (I love a chewy cookie...crispy ones, not so much.)

Cranbery White Chocolate Chop Cookies
1 1/4 cup all-purpose flour
1/2 tsp. baking powder
1/2 tsp. baking soda
1/4 tsp. salt
1/2 cup unsalted butter, at room temperature
1/2 cup light brown suagar
1/2 cup granulated sugar
1 egg
1 tsp. vanilla extract
1 cup old-fashioned rolled oats
1 cup white chocolate chips
1 cup dried cranberries
Preheat oven to 375 degrees. Line two baking sheets with parchment paper or a silicone baking mat; set aside.
In a medium bowl whisk together the flour, baking powder, bakind soda, and salt. Set aside.
In the bowl of a stand mixer, cream the butter and both sugards together until light and fluffy, about 3 minutes. Add the egg and the vanilla extract and mix until well combined. Reduce the mixer speed to low and gradually add the flour mixture, mixing until just incorporated. Using a rubber spatula, stir in the oats, the white chocolate chips, and the dried cranberries.
Roll dough into balls - about 2 tablespoons of dough per cookie - and place on the prepared baking sheets. Flatten the tops slightly with your fingers. Bake until teh cookies turn slightly golder, about 10 minutes. Remove from the oven and let cool on the baking sheet for 2 minutes. Transfer to a wire rack until completely cool. Store in an airtight container at room temperature.

Monday, February 21, 2011

Stuffed Peppers

We never once had stuffed peppers for dinner when I was growing up. Never. Ever. The first time I ever saw a stuffed pepper was in the college dining center, and lots of friends commented on how much they dreaded it when their moms announced that they'd be having stuffed peppers for dinner. So...I'm not exactly sure what posessed me to try stuffed peppers in the first place! We've had them several times (one version is posted here), and this is my favorite recipe. I like that this one doesn't have any tomatoes, and I love the cornmeal topping!

This meal is really quite simple to put together, but there's a lot of preparation involved, most of which is chopping. (And by the way, if you have a good, sharp knife, it makes prep time a lot less tedious! Always remember, a dull knife is a dangerous knife.) There's also rice to prepare. What I'm telling you is this: this is not a quick meal to throw together. Don't even attempt it on a night that you're super-busy or super-tired. Save it for a day when you have plenty of time, and it will be well worth it. The leftovers heat up beautifully, and lots of times I have filling left over. When that happens, I portion it into ramekins, add the cornmeal topping, and bake. That way I have little pre-portioned lunches to just grab out of the fridge. And a bonus: it's healthy, too!

Stuffed Peppers
Adapted slightly from Heather's Website
4 medium green bell peppers
8 oz. lean ground beef
1 1/2 cup chopped onion
1/2 cup chopped celery
2 tsp. minced garlic
1 1/2 cup cooked brown rice
1/2 tsp. salt, plus more for seasoning
1/4 tsp. freshly ground black pepper, plus more for seasoning
1/2 tsp Greek seasoning (I use Cavender's)
1/4 cup chopped green onions (I use the whole thing)
1 tbs. chopped parsley leaves
2 tbs. plain cornmeal
2 tbs. grated parmesan
4 tsp. canola oil
Preheat the oven to 400 degrees. Cook brown rice.
Cut off the top quarter of each bell pepper and reserve. Scoop the seeds and veins out from the inside of each pepper and discard. Set bell pepper shells aside. Removed and discard the stems from each bell pepper top. Dice enough of the bell pepper tops to make 1/2 cup. Set aside.
In a large skillet, over medium-high heat, brown the ground beef until cooked through, about 4 minutes. Add the onions, 1/2 cup diced bell pepper, and celery. Saute for 4 minutes, or until the vegetables are soft. Add the garlic and cook, stirring, for 1 minute. Add the rice and mix well. Season with salt, pepper, and Greek seasoning. Cook for about 1 imnute. Remove from the heat and stir in the green onions and parsley. Season the insides of each bell pepper shell with salt and pepper, to taste. Spoon the rice mixutre into the bell peppers.
In a small bowl, combine the cornmeal and cheese. Season with a pinch of Greek seasoning and mix well. Sprinkle the crust over each pepper. Top each crust with 1 tsp. of canola oil and place the peppers into an 8-inch baking dish or pan. Add just enough water to cover the bottom, about 1/3 cup. Bake for 25-30 inutes, or until the tops are crust and brown and the filling is warmed through. Serve hot.
Related Posts Plugin for WordPress, Blogger...